Friday, 6 February 2015

Sugar for Children


Sugar IDE
Sugar is an interactive and easy to learn platform for kids. And now, coming to what is Sugar? Sugar is a free and open source desktop environment designed for interactive learning for children. It started as a part of One Laptop per Child project (OLPC) as its default desktop environment. The mission of OLPC is to develop low cost laptops and provide children around the world with new opportunities. Sugar is a free software developed under Sugar Labs, which is a non-profit organization where developers and educationists work together for the development of the software. Sugar Labs is a community that supports and promotes Sugar learning platform.

Sugar is an attractive and colorful desktop environment created with an aim of quality education for children. Sugar does not use desktop, folder or window as its user interface objects. Instead, it uses a full screen view which helps children to concentrate on one job at a time. It is developed in Python language and runs on GNU/Linux. It is released under GNU General Public License and is available in 25 languages. Most applications in Sugar are the forks of existing applications in GNOME. It is available as USB-Bootable Linux distribution and Live CDs.

Why Sugar is interesting? 
Sugar supports sharing and collaboration for users. It does not contain applications like other desktop environments. Learner applications in Sugar are called Activities. It includes activities like Pippy(introductory environment to learn Python), Journals(object and activity browsing), Distance(measure the distance between two laptops) etc which are exclusively designed for easy use for kids. In the Sugar Neighborhood view, children see their connected friends; they can join each other’s activities.

Sugar teaches you through three experiences:

Sharing, which shows the presence of others involved in the activity by sharing ideas.

Reflecting, where Sugar uses journals to record each activity of the user which helps in progress assessment.

Discovering, where users of different levels of skills join together in a single platform and go deeper and deeper with no restrictions.

Sugar provides children with the opportunity to explore, express and experiment themselves. 

References 


Friday, 9 January 2015

Writing a simple Linux Device Driver

          A device driver is a program that controls a particular type of device that is attached to your computer. There are device drivers for printers, displays, CD-ROM readers, diskette drives, and so on.
Now let us write a simple Hello World driver code.
Create a directory anywhere in your home folder and navigate into that directory.
mkdir hello
cd hello
Create two files hello.c and Makefile
You can use any editor as you wish. Here I use Kate.
kate hello.c
Type the following code

#include <linux/init.h>
#include <linux/module.h>
static int __init hello_init (void) {
printk(KERN_ALERT "Hello World!!!");
return 0;
}
static int __exit hello_exit(void) {
printk(KERN_ALERT "Goodbye World!!!");
return 0;
}
module_init(hello_init);
module_exit(hello_exit);

Here, the hello_init() function runs when the module is loaded and hello_exit() funtion runs when the module is unloaded. Save the code.
Next we can create the Makefile.
kate Makefile
Type the follwing code in it. Make sure that you intent the code perfectly.


ifneq ($(KERNELRELEASE),)
obj-m := hello.o
else
KERNELDIR ?= /lib/modules/$(shell uname -r)/build
PWD := $(shell pwd)
default:
    $(MAKE) -C $(KERNELDIR) M=$(PWD) modules
clean:
    rm -rf *.o *.ko *.mod.*
endif


When you are done till here, we need to build the module. For that type,
make
It hardly takes half a minute. When the module is successflly built, you get a bunch of object files in the hello directory. Thus the Hello World module is ready.
Now let's see the working of the module by loading it into the kernel. Type,
sudo insmod hello.ko
This will load the module into the kernel which we can check by typing ,
lsmod
You get a list of module on top you get your hello module. To see whether the module is running in you kernel or not, type
dmesg
The Hello World message will be printed that we wrote in hello.c file
To remove the module type the following instruction in the terminal
sudo rmmod hello
Here the exit function that we typed in hello.c is run. To check the output type,
dmesg

Friday, 28 November 2014

Thanks to SSR...


            First of all, thanks to SSR Project. You may be wondering what is SSR. SSR stands for Student Social Responsibility Project conducted by our college for all third year Engineering students. We can undertake any project that is socially challenging or beneficial. We were divided into teams of six. The first idea that clicked our brain was RCC visit at Trivandrum. We were so excited to move with that idea. Next day we contacted the RCC authorities. But BAD LUCK… They are not encouraging any outsiders due to infection threat to the patients. We had to drop our project . Then the next one…. Visiting Vimala Hridaya, school for mentally challenged children. We ran up and down the college for all the formalities and permissions. Finally we were all set by one evening. But again bad luck. That project was chosen by another team. Again disappointment… Then complete silence for a few days….
Then we came up with new more ideas. We wanted to do something that will stay in future in the name of our project. That’s how we thought of Self Defense for girls, Organic Gardening and Computer Skills for students. We wrapped these ideas into one project… TOGETHER TOWARDS A BETTER FUTURE.
As usual, we started up with a group discussion. We divided our project into three parts
Nirbhaya - Self defense class for girls
Swasth - Organic gardening
Aastha - Computer skills for students

 Here our journey starts….     
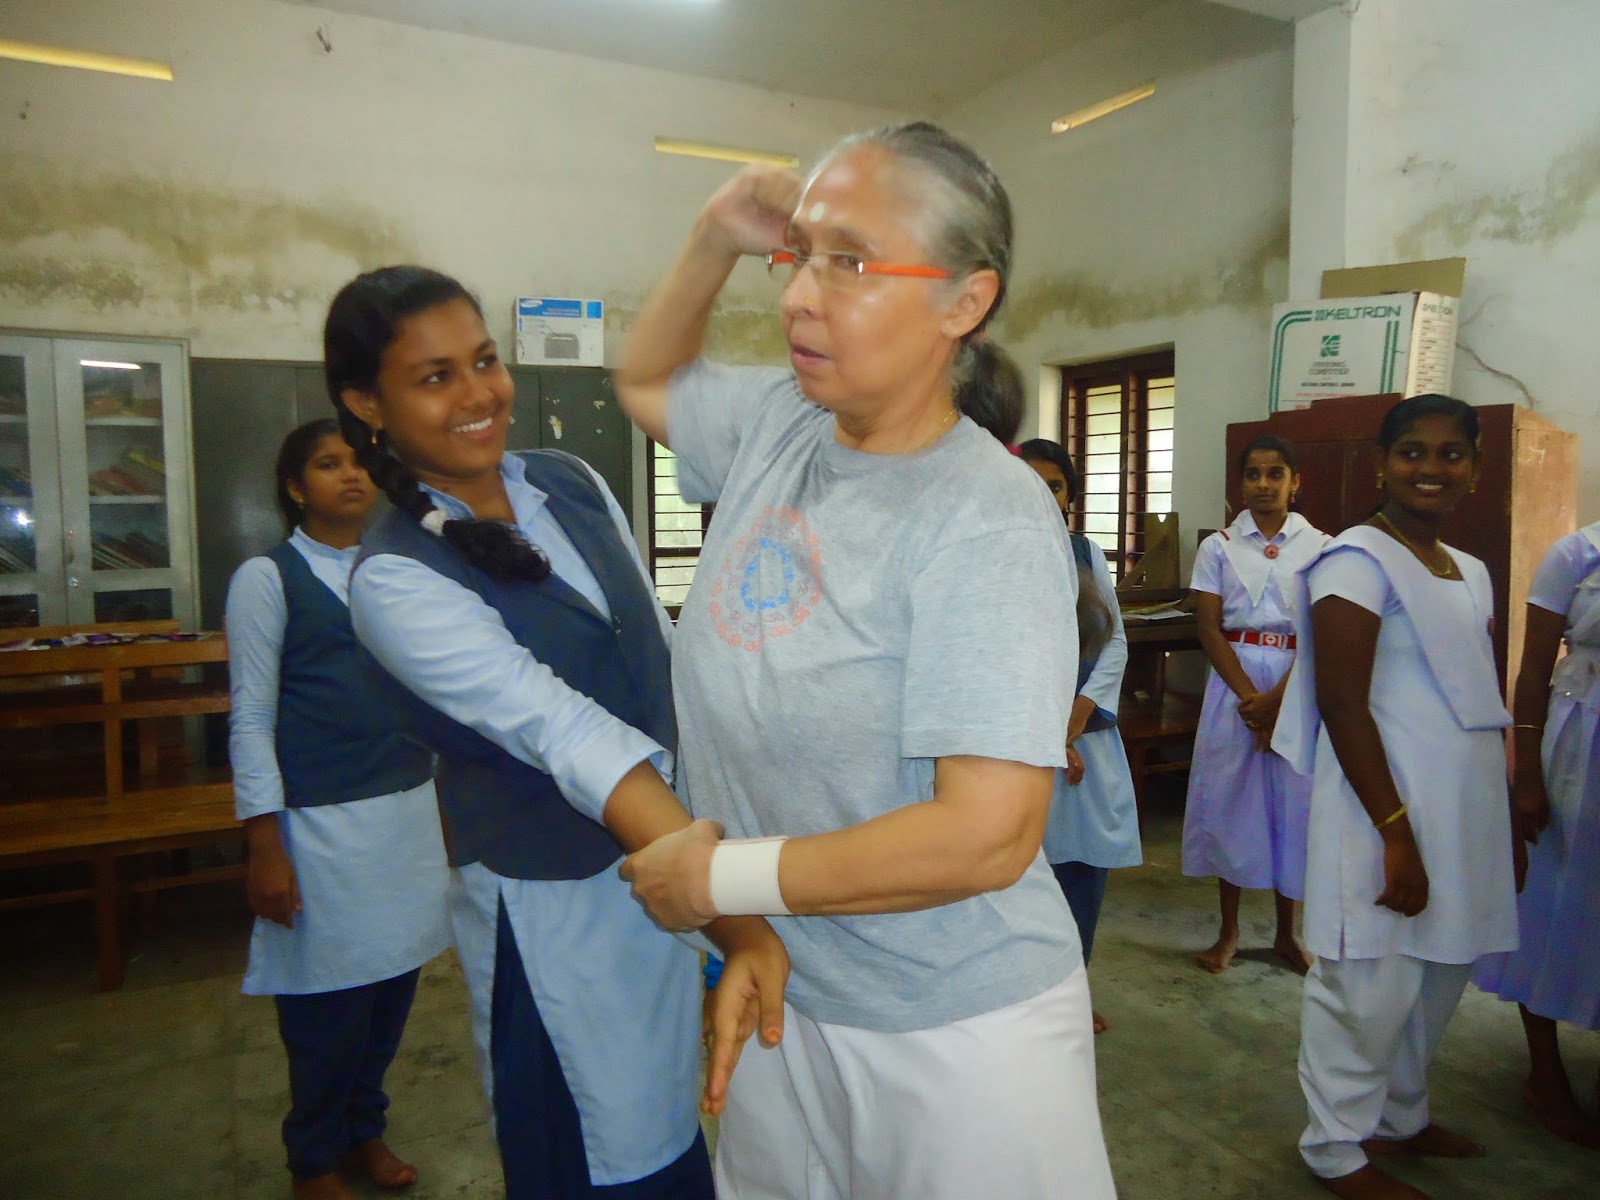
First step was to get a lady who is trained in martial arts. We came to know about one from our seniors. We ran to ashram(Mata Amritanandamayi Math) to meet her.. Again the luck factor plays the role. She went to Australia, her home town. Again disappointment. But, the people in International office gave us a ray of hope. They said that there is another lady who is trained in martial arts. They took our phone number telling that they will ask her to contact us. But, still the hope was too far… We waited for next two days for a phone ring… But nothing happened. Suddenly after some days we got a call. It was her, calling us asking to meet her. The very next day, we ran to ashram with all the hopes fulfilled. But when we saw her, we were hmmmmm. She is pretty old. Her name is Ms. Nirupama. She told us that she is no longer practicing and it would be hard for her to take a workshop. But we didn't give up. At last we got a YES from her. That was great a response. We are again in ON mode.
Things became more easy after meeting her. When we told her about the other two ideas, she took us to the organic garden there in ashram and we were directed to the organic farm near the ashram beach. But we couldn't meet the concerned person over there. We were asked to come on next day. Again next day… We went there and waited around 3 hours. Finally we met Gurudas swami who is in charge of Organic farming in ashram and he provided us with some vegetable seeds and saplings. Thus the day 13th November was fixed for the project and everything was done.

On 13th November 2014
By 8:30 am we reached ashram to pick Nirupama Ma’am. She was all set. We hired an auto to Thazhava higher secondary school. By 9:45 we reached the school. We could see many innocent faces looking at us amazingly. Something that took me to my past was the sight of teachers caning the students for silly reasons. It took sometime for us to get back from our childhood days. We spoke to the principal and we had to wait till 10:30 to start our session.
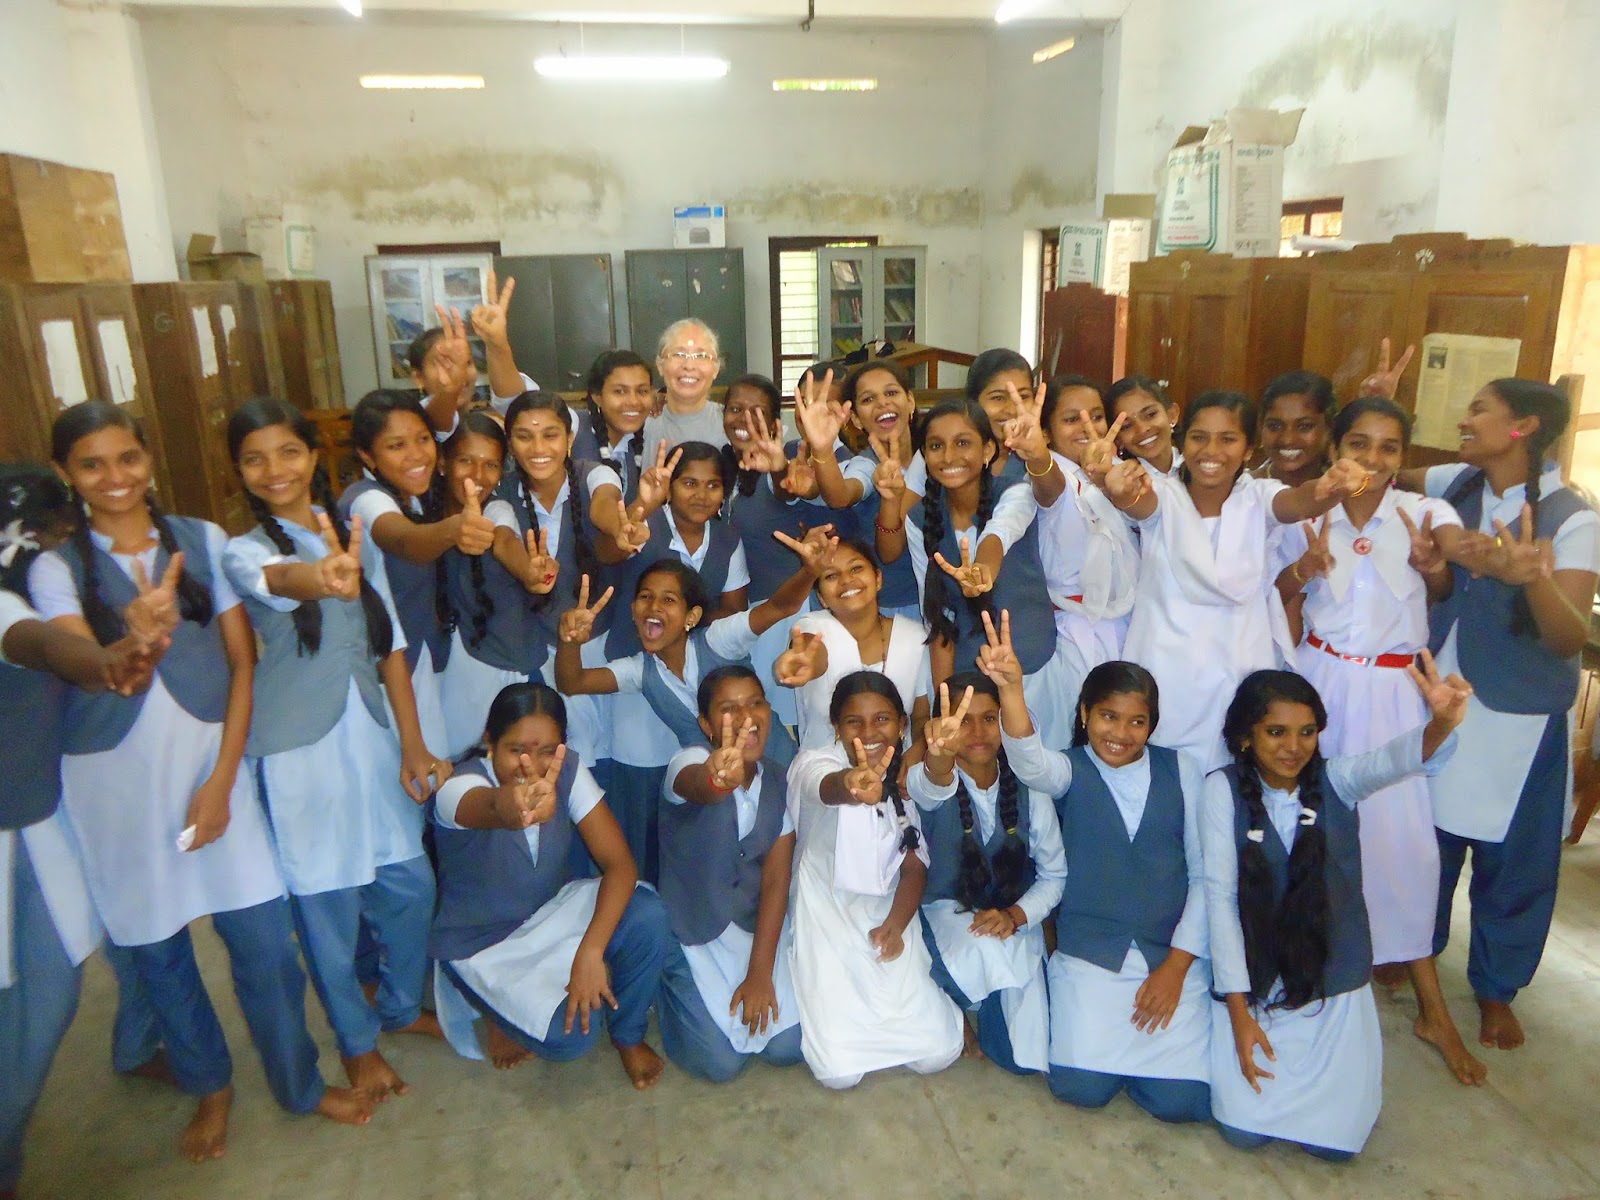
By 10:30 am, IXth standard students lined up and came to the library. Library was the spot allotted to us to conduct our session. All were very enthusiastic to know what is going to happen. We introduced ourselves and Nirupama Ma’am to them. It started with a warm up. She taught the basic methods of defending, when they are attacked from behind, front and various other directions. We ourself became trainers to them repeating what she does. It lasted for two hours.They were very eager to learn more. We had a great satisfaction when we saw their interest. They really didn’t want to leave Nirupama Ma’am. They hugged and kissed her. The session got over by 12:30 pm. Then it was time for lunch. School authorities had arranged lunch for us. After lunch, Nirupama Ma'am returned to ashram.
 

Then we had Organic farming where we took a session for Viith and VIIIth standard students. We were amazed to see their interest. More than us, they shared the knowledge and experieces. We talked about chemical pesticides and the future of mankind if we continue using chemicals in food. We also discussed about why Organic farming is important. We then distributed organic seeds, saplings and compost which we collected from ashram to the students. They promised that they will surely take care of the plants.
The next agenda was Computer Skills for IXth standard students. Due to time limit, we had to stop it in one hour. We taught them basic Linux commands and how to use Linux and its features. We also talked about Cyber crimes and security.
And, thus our project came to an end. We had a great time with students. Thanks for the students who corporated with us. We understood that they enjoyed it a lot and they need more programs from us. We got a very good feedback from the students and teachers. More than a project, it was an awesome learning experience.
A great thanks to our college CIR(Corporate and Industrial Relations) and the faculty members for giving us a Social Responsibility project to learn from experiences. Though we had hurdles in the beginning, everything went well with god's grace. Now, when we think of the difficulties we had, its a great joy to cherish. Once again I would like to quote “Experience is the best teacher”.

Friday, 21 November 2014

GNU General Public License


                     GNU General Public License is the widely used license for free software which ensures the users the right to study, copy, alter and share the softwares. Softwares that acquires these rights are called Free software. This License is first released by Richard Stallman of the Free Software Foundation(FSF) for GNU Project in 1989. This license is based on the copyleft principle. i.e, the chain of users involved should distribute their work or modifications that he/she has done to the software under the same license. It is the first copyleft license for general use.
                   The GPL accounted for nearly 65% of the 43,442 free softwares projects listed on Freecode as of August 2007 and about 68% of the projects listed on SourceForge.net by January 2006. Most widely used free software that are licensed under GPL includes Linux Kernel and GNU Compiler Collection(GCC). There are also some dual licensed free softwares like MySQL in which one being the GPL.
                  On 29 June 2007, the third new version of the license(GNU GPLv3) was released to solve the issues that GNU GPLv2 had. To keep the GPL updated, developers has the option to choose “any later version” clause. This is to choose between the original terms or terms imposed by the new version imposed by FSF. For example Linux Kernel is under GPLv2 without “any later version” clause.
Now let's see the different versions of the GPL
Version 1
                 The first version of GPL was released on 25th February 1989. It was mainly published to prevent the restrictions that violated the definition of the Free software. The first problem that GPL solved is that, the distributors were asked to produce the human readable form of the source code along with the binaries under the same licensing conditions.
The second problem was that vendors imposed additional restrictions to the license and combined softwares with other which had other restriction on its distribution. To avoid this GPLv1 said that altered or modified software as a whole has to be distributed under same conditions.
Version 2
               According to Stallman, the prominent change in GPLv2 was “Liberty or Death”. It states that, restrictions that prevent him or her from distributing GPL licensed software in a way that respects other users' freedom, he or she cannot distribute it at all.
Version 3
           GPLv3 was released on 29th June 2009 by Richard Stallman with legal counsel from Eben Moglen and the Software Freedom Law Center.
The major changes in GPLv3 are in relation to free software, software patents, “source code” definition and hardware restrictions on software modification. GPLv3 improves compatibility with several open source software licenses such as Apache License, version 2.0.
It was a long journey when they finally published the third version GPLv3 on 29th June 2009.

Thursday, 25 September 2014

Critical Section

In concurrent programming, Critical section is a set of statements that should be run exclusively . When multiple processes that shares same data are run simultaneously there are chances for the data to be inconsistent. So an operating system is designed in such a way that only one of the processes among them is allowed to access the shared data at a time. A critical section terminates in a fixed time, so a process or task must wait for that fixed time to enter its critical section.
Critical section is used when multi threaded programming need to manipulate a shared data without creating further threads conflicting the data. It also ensures that a shared device is accessed only by a single process at a time.
In single processor systems critical section can be implemented by disabling interrupts while entering the critical section, prevent system calls causing context switches while inside the critical section and restoring the interrupts while exit. With this implementation, any thread entering critical section any where in the system will prevent other thread trying to execute its critical section. Thus CPU can’t be accessed by any other process until the running process exits the CPU.
So far there are many algorithms that came up with solving the issues regarding the execution of critical section. The solutions for critical section is a wide area to discuss...

Tuesday, 12 August 2014

top and htop commands in Linux

        Linux provides utilities called top and htop to monitor the real time processes. They displays the dynamic real-time view of the running system. But, both the command are quite different in action.
Top command displays the Linux processes. It can display system summary information and processes or threads currently managed by the kernel.  When we type top in terminal we get the currently running process as shown in Fig 1.


                                              Fig 1:top  displaying running processes

Even though htop is quite similar to top there are some extra features that makes htop better command utility than top. The htop utility is not already built in Linux, it should be downloaded and installed. Once it is installed  it can be run through command line by just typing 'htop' (We can install it by just typing sudo apt-get install htop)

The Fig 2 shows the htop window look like,

                                                          Fig 2 :htop window


Now let's see what htop displays,

The top left corner:
The numbers 1,2,3 and 4 represents the number of cores in the system. The bars next to these numbers shows the loads on the cores. The colour difference in the bars represent different information. Below that lies memory and swap information.

The top right corner:
Here information related to  loads, threads, load average and up time are displayed. Load average is the amount of work that system does. Here in my system load average is 0.34 which means very less load on CPU. If it goes up to 2 it means that system is making use of CPU 100%.

Process related information:
The information about each process is divided into columns. The explanation of each column is as follows:


     PID: Process ID of a process
    USER: User owning the process
    PR: Priority of the process.
    NI: The nice value for a process.
    VIRT: Virtual memory consumption.
    RES: Physical RAM consumption in kilobytes.
    SHR: Shared memory consumption.
    S: Process status (sleeping, running etc).
    CPU%: CPU consumption
    MEM%: Physical RAM consumption.
    TIME+: Processor time used by the process.
    COMMAND: Command that started the process.

Htop provides many features to customize it according to user's taste. At the bottom of the htop window we can see F-keys and its function written next to them.

Saturday, 2 August 2014

Installing MariaDB

You can know what is MariaDB from my previous blog http://amruthasangeeth.blogspot.in/2014/06/mariadb_17.html


Now let’s see the installation of MariaDB
Step 1
First make sure that required packages are installed and  add apt-get key for Mariadb repository using following command
$ sudo apt-get install software-properties-common
$ sudo apt-key adv --recv-keys --keyserver hkp://keyserver.ubuntu.com:80 0xcbcb082a1bb943db

Add apt-get repository as per your Ubuntu version
For Ubuntu 13.10
$ sudo add-apt-repository 'deb http://ftp.kaist.ac.kr/mariadb/repo/5.5/ubuntu saucy main'
For Ubuntu 13.04
$ sudo add-apt-repository 'deb http://ftp.kaist.ac.kr/mariadb/repo/5.5/ubuntu raring main'
For Ubuntu 12.10
$ sudo add-apt-repository 'deb http://ftp.kaist.ac.kr/mariadb/repo/5.5/ubuntu quantal main'
For Ubuntu 12.04 LTS
$ sudo add-apt-repository 'deb http://ftp.kaist.ac.kr/mariadb/repo/5.5/ubuntu precise main'


Step 2
Install MariaDB using the following commands
$ sudo apt-get update
$ sudo apt-get install mariadb-server

Provide the root account password as given below


Step 3

Login to MariaDB using the following command after installation
mysql -u root -p


Creating a database in MariaDB
Entering the account administrator password set up during installation you will be given a MariaDB prompt.

We will create a database to learn on called students using the following command
CREATE DATABASE  students;
We will switch to the new database
USE  students;
Now the database is created and we can create a table.
CREATE TABLE details(student_id int(5) NOT NULL AUTO_INCREMENT,
                        name varchar(20) DEFAULT NULL,
                        age int(3) DEFAULT NULL,
                        marks int(5) DEFAULT NULL,
                        PRIMARY KEY(student_i)d
                        );
To accomplish what we have done, use the following command,
show columns in details;


Each column in table creation command is separated by comma and follows this fashion,
Column_Name Data_Type[(size_of_data)] [NULL or NOT NULL] [DEFAULT default_value]
[AUTO_INCREMENT]

The values of each column definition are,
* Column Name: Describes the attribute being assigned.
* Data Type: Specifies the type of data in the column.
* Null: Defines whether null is a valid value for that field. Can be "null" or "not null".
* Default Value: Sets the initial value of all newly created records that do not specify a value.
* auto_increment: MySQL will handle the sequential numbering internally of any column marked with this   option, in order to provide a unique value for each record.

Ultimately before closing the table definition we need to use primary key by typing PRIMARY KEY(column name).It guarantees that , this column will serve as a unique field.

Inserting data into MariaDB table
INSERT INTO details(name,age,marks) values ("anu",15,450);


INSERT INTO details(name,age,marks) VALUES("Bob",15,400);


We need not add values in student_id.It is automatically incremented.All other values are given in quotes.

Deleting a table
To delete a table, type the following command
DROP TABLE table_name;
Once the table is deleted, the data inside it cannot be recovered.

Now we can view the current table using “show tables” command. This command gives all the tables inside the database.
SHOW tables;
Then, after deleting the table.
DROP TABLE details;
Query OK, 0 rows affected (0.02 sec)

SHOW tables;